Welcome to IPMS Ottawa's ongoing monthly SHOW & TELL, which allows club members to show off their completed work despite not being able to attend group meetings. Each member is invited to send in up to three photos of a model and some explanation. December marks our seventeenth (17th) on-line show & tell. We thank all of our members and builders for keeping alive the hobby. All entries are always welcome.
THANK YOU TO ALL PARTICIPANTS, and KEEP BUILDING.
! Miniature world domination !
Enjoy our show, and we all hope to meet again soon.
STRANGE MODEL OF THE MONTH
Сухой Су-27УБ Sukhoi Su-27 UB (Kitty Hawk 1:48)
Су-27 УБ с гвардейцем Котом
Su-27 UB with guard kitty
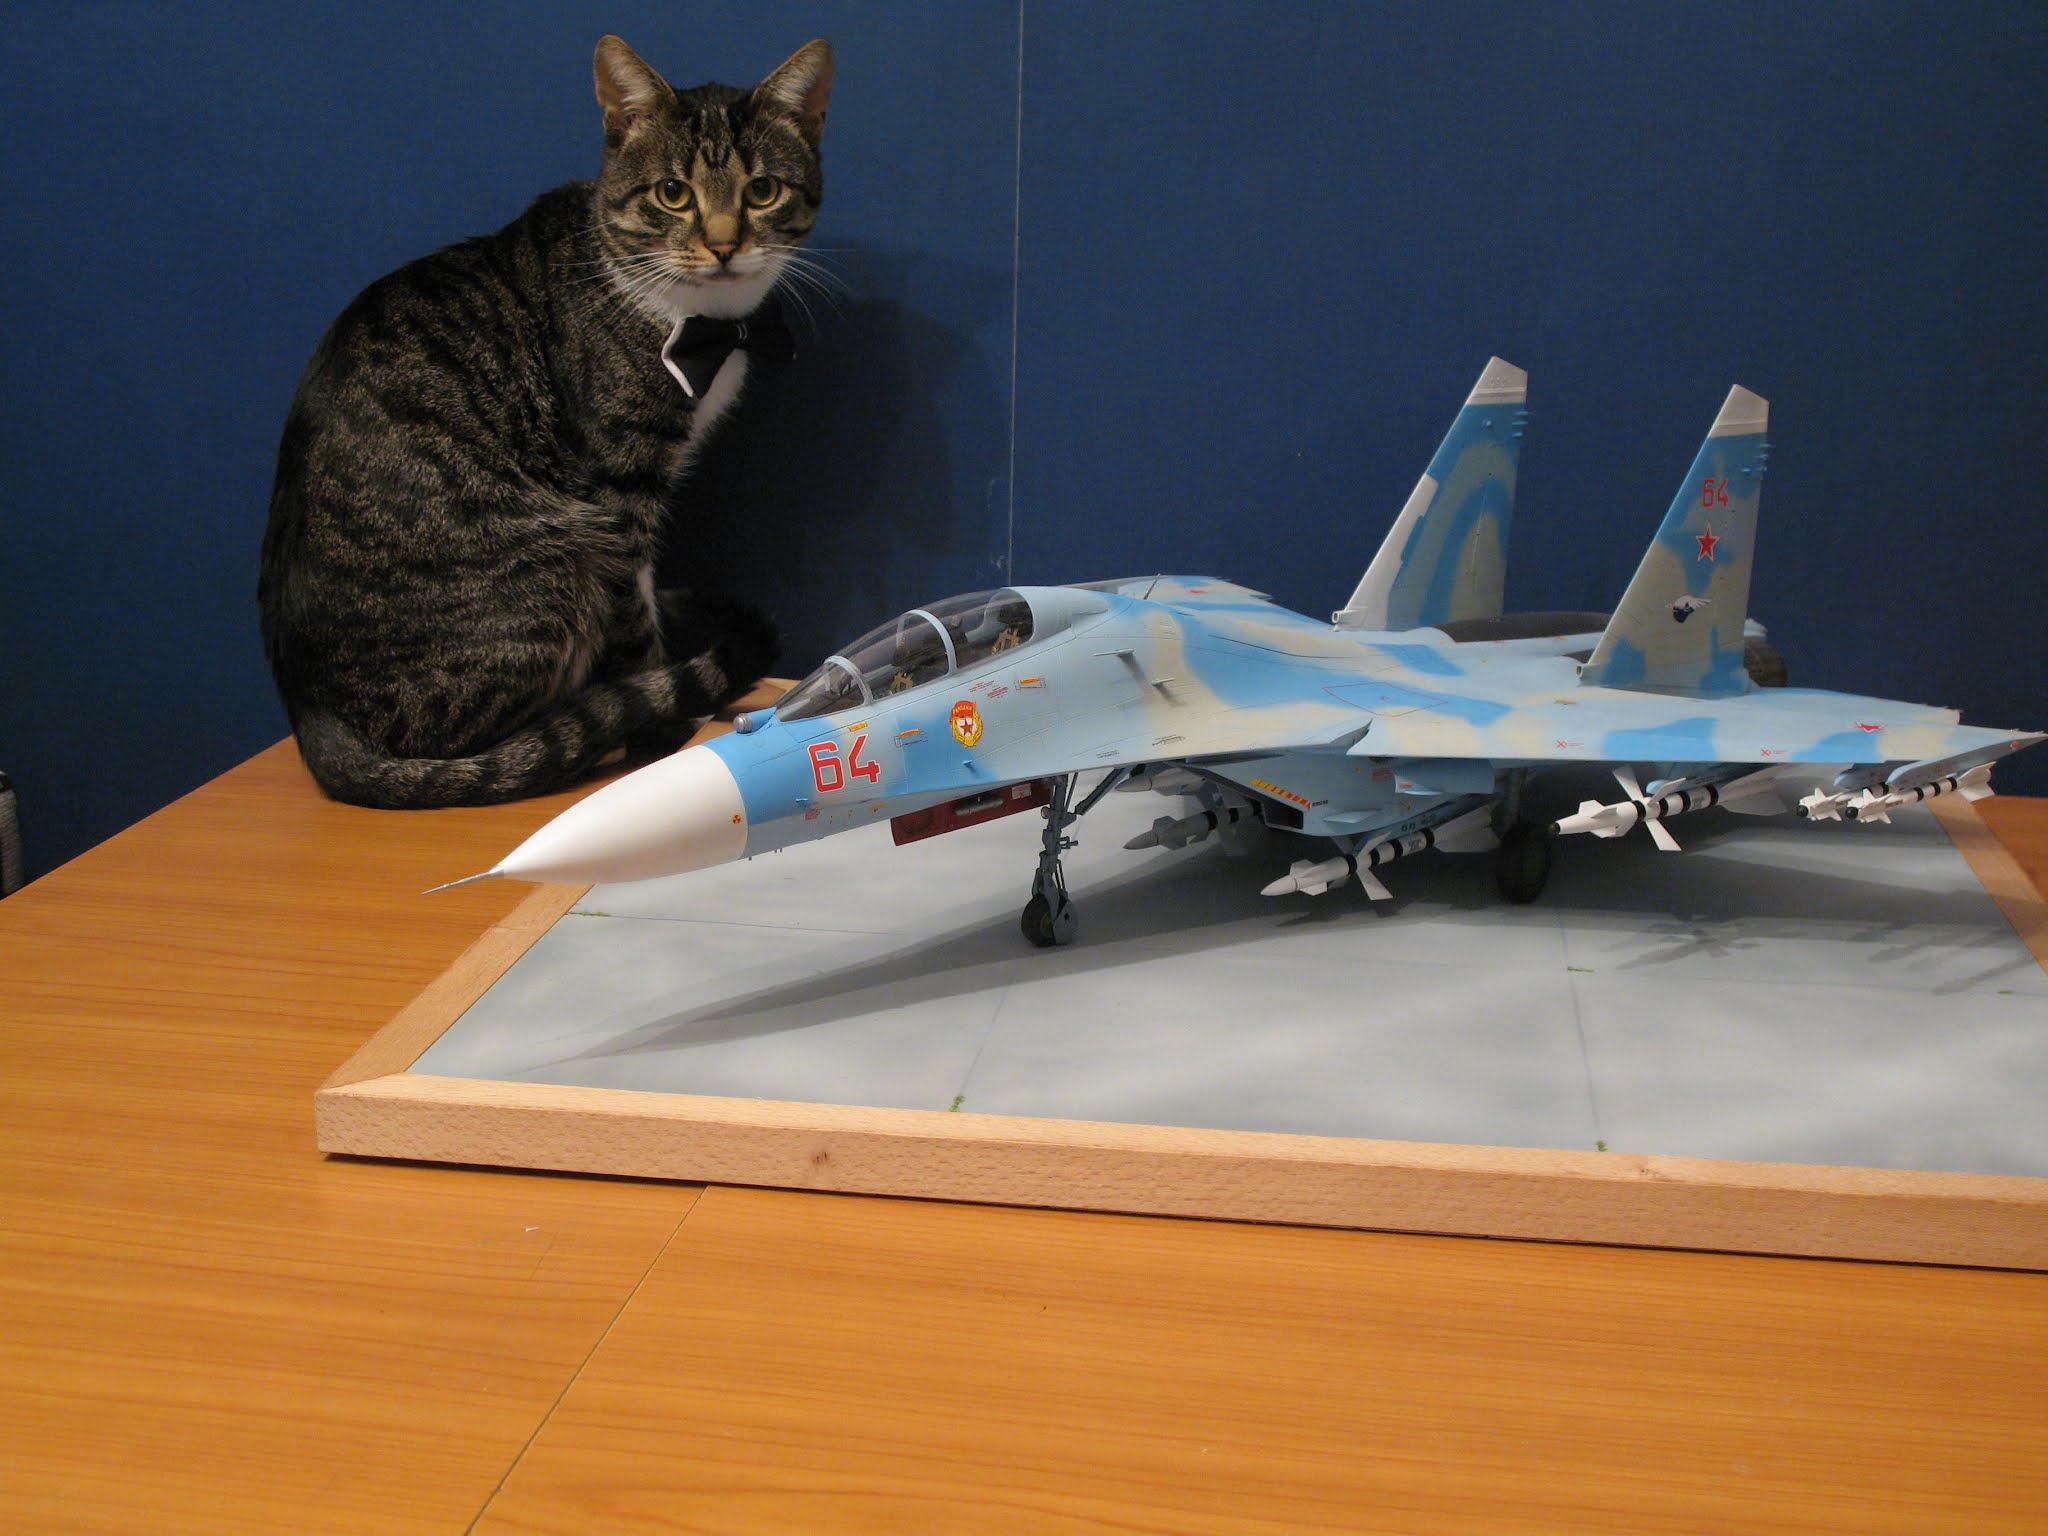 |
Су-27 УБ с гвардейцем Котом Su-27 UB with guard kitty |
FINISHED MODELS
Aerospatiale SA-341D Gazelle (Fujimi 1:48)
Fellow Club Members:
I picked this kit up at The Hobby Center for $8 some time ago. It went together rather well. I used a combination of Testors and Tamiya paints. Good instructions. I like to use Testor's clear glue when I can as it doesn't eat paint! - however it has a long cure time. This glue is no longer available though. (editor: it is still on the shlves, so get it while you can)
In spite of my best efforts, it is a tail-sitter! Built out of the box. Tricky doing a 2 tone paint job. Enjoyed researching the 1:1 and building this kit.
Ken Rush
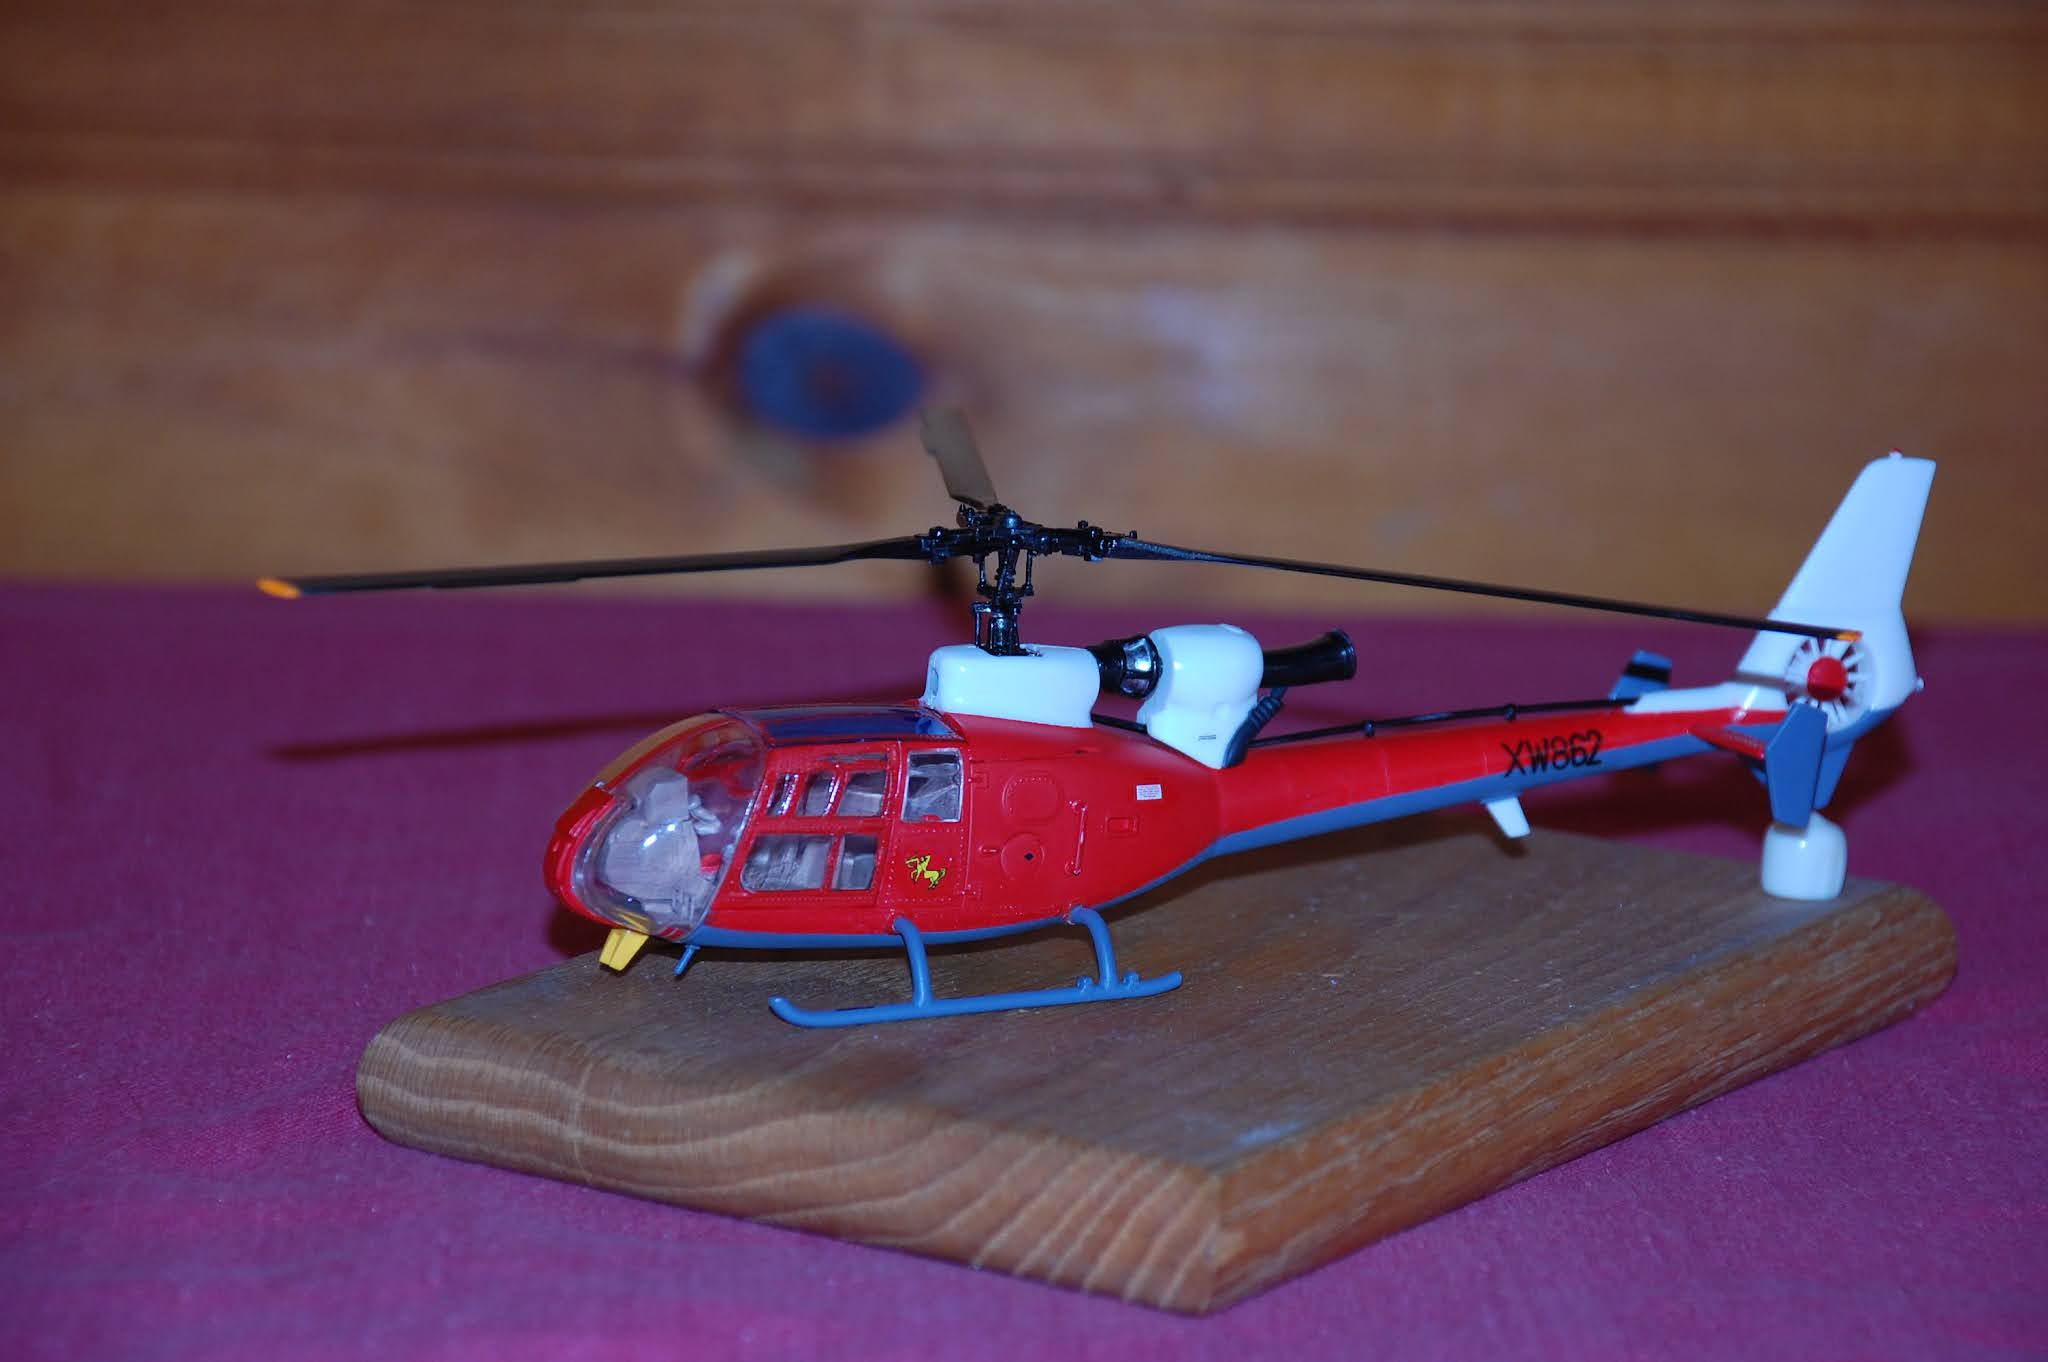 |
| Aerospatiale SA-341D Gazelle |

 |
| actual Aerospatiale SA-341D Gazelle |
 |
| Aerospatiale SA-341D Gazelle |
North American Mustang Mk III (Revell 1:72)
Here is the most recent (a few months ago) kit that I made "out of the box", except I added a pilot figure (since I display my aircraft in flying configuration). The markings are for RAF 316 Sqn SZ*H, which may have been flown by Jan Zurakowski, who later became a test pilot for Avro Canada.
All the paint is Model Master enamel. For the camouflage I made paper masks assembled from photocopies of the painting guide in the instructions.
Peter de Salis
 |
| Mustang Mk III |
 |
| Mustang Mk III |
 |
| actual Mustang Mk III |
Goodyear FG-1D Corsair Mk 4 (Academy 1:72)
Very much not out-of-the-box, this is my rendition of a Royal Navy Fleet Air Arm Corsair flown by Lt. Robert Hampton Gray RCNVR, VC, DSC in late summer 1945. The markings are for KD560 1*19 of 1841 Sqn from HMS Formidable in the Pacific theatre late in WW2.
I made the main changes that British Corsairs had: "clipped" wing tips, side air scoops, and ventral air outlet. I'm not sure if British or American bombs were used – I decided to go with British 500 lb. bombs (not in the kit) and made pylons to hold them. Paint is Mr Hobby Navy Blue, with various Model Master enamels, Tamiya acrylics, Mr Hobby acrylics, and AK Real Colours. Decals are Xtradecal except for the ROYAL NAVY and serial number which are Flight Colours.
Peter de Salis
Editor note: The citation for his VC, gazetted on 13 November 1945, described as being: "For great valour in leading an attack on a Japanese destroyer in Onagawa Wan, on 9 August 1945. In the face of fire from shore batteries and a heavy concentration of fire from some five warships Lieutenant Gray pressed home his attack, flying very low in order to ensure success, and, although he was hit and his aircraft was in flames, he obtained at least one direct hit, sinking the destroyer. Lieutenant Gray has consistently shown a brilliant fighting spirit and most inspiring leadership". Please note this was the same day the USA dropped the second atomic bomb on Japan at Nagasaki.
 |
| FG-1D Corsair Mk 4 |
 |
| FG-1D Corsair Mk 4 |
 |
| FG-1D Corsair Mk 4 |
 |
| an actual FG-1D Corsair Mk 4 on HMS Formidible |
 |
| Lt. Robert Hampton Gray, VC Born in Trail, BC in 1917. Died in Japan at the age of 27. |
Boeing PT-27 Kaydet (Revell 1:72)
Just completed, here is my first ever biplane model, a Boeing (formerly Stearman) PT-27 Kaydet. This one has markings for FJ888 of 36 Elementary Flying Training School, Pearce AB in the summer of 1942. This was a simple, sturdy plane that was used for initial flight training. When flown solo (as here) the pilot sat in the rear seat, for the correct weight & balance and for better outward visibility.
I replaced the kit engine with the correct Continental R-670 (from Engines & Things) and added Yahu instrument panels and a control stick in the front seat. I added some other details such as fuel lines, landing gear scissors and brake lines, rear grab handles, and rigging. I found the rigging difficult – I used guitar string and elastic thread.
Note to future builders: the lower wing needs more dihedral, the rear of the N struts needs to be shortened so that the wings are parallel, and the cabane struts (from the engine cowling to the upper wing) are too short and need to be scratch built – I used plastic rod squished in a vice to make it oblong.
Paint is Model Master Dark Yellow enamel (with a couple drops of cobalt drier to make it cure) over Mr Color white base, plus various MM enamels, Tamiya acrylics, and Mr Hobby acrylics. Decals are from Xtradecal.
Peter de Salis
 |
| Boeing PT-27 Kaydet |
 |
| Boeing PT-27 Kaydet |
 |
| Boeing PT-27 Kaydet |
 |
| actual PT-27 Kaydet |
BTR-60PU-12 Бронетранспортер Armoured Transporter (S-Model)
BTR-60 converted to a Comms vehicle. Turret removed, boxes added, grab handles & hatch handles, added and comm mast hidden by green condom looking cover!?
Graham
Editor note: This is probably the air defence control vehicle. The BTR-60PU-12 (9S482) (пункт управления, Control Point) (1972) is a BTR-60PB converted into an air defense command vehicle and used by units equipped with ZSU-23-4, SA-9 or SA-13. The turret was removed and the vehicle was fitted with the AMU telescope mast on the right side of the front hull roof and the AB1-P/30 1 kW generator on top of the blanking plate. The vehicle is equipped with the 1G13 gyroscope, the KP-4 navigation apparatus and the ASPD-12 computer. Often, the PU-12 is connected to a radar and the radar image is directly visible on the vehicle's IT-45 monitor. BTR-60PU-12M can process up to 12 targets.
BTR-60PU-12M (9S482M) is the modernized version developed in the 1980s for units equipped with more modern SAM systems. This model is equipped with the more modern ASPD-U computer instead of the ASPD-12 and with the S 23-1 data processing unit connected to the MP-21, MP-22, Strela-10M, Osa-AK etc. BTR-60PU-12M can process up to 99 targets instead of only 12.
 |
| BTR-60PU-12 air defence communications vehicle |
 |
| BTR-60PU-12 air defence communications vehicle |
 |
| actual BTR-60PU-12 air defence communications vehicle |
Senso-ji Temple 金龍山浅草寺 (Doyusha 1:400)
This is the Senso-ji Temple 金龍山浅草寺 in Asakusa, Tokyo, Japan.
The legend says that in the year 628, two brothers fished a statue of Kannon, the goddess of mercy, out of the Sumida River, and even though they put the statue back into the river, it always returned to them. Consequently, Sensoji was built nearby for the goddess of Kannon. It is the most visited spiritual site in the world with over 30 million visitors annually.
The Hozomon (宝蔵門, "Treasure-House Gate") is the inner of two large entrance gates. Hozomon's second story houses many of the Senso-ji's treasures. The first story houses two statues, three lanterns and two large sandals.
The five-story pagoda is one of the most famous in Japan. Buddha's ashes are stored on the top floor.
This was a fun weekend Covid-19 build. I want to build more kits from their castle and temple series. The giant red lantern in the gate building has the actual Japanese character inscription written on it by me with a fine Sharpie pen.
 |
| Senso-ji Temple 金龍山浅草寺 |
 |
| actual Senso-ji Temple 金龍山浅草寺 |
1955 Daihatsu CM10T (ARII 1:32)
Daihatsu was famous for making tricycle trucks before and after WWII. The company, originally from Osaka, began building the CM10T in 1955. The truck was an excellent transporter in tight Japanese city streets and lanes, and in rural areas for farm use. Sadly I could find out no more about this tricycle truck which could actually carry another smaller truck.
Paint is exclusively Vallejo, using primarily Russian Air Force Blue which beautifully matched the box art and plastic. I added the following features:
handbrake under dashboard
brake and gas pedals
Japanese language newspapers on seat
aged wooden flooring in cargo space
surplus military tool box in cargo space
stork-brand box in cargo space
steel rail in cargo space
hand-painted speedometer and guages (because I missed it on the decal sheet)
electrical cables for battery
brake line for front wheel
driver side floor mat
super-secret adverts for "geisha" personal services on ceiling of cab.
John Clearwater
 |
| 1955 Daihatsu CM10T |
 |
| 1955 Daihatsu CM10T |
 |
| 1955 Daihatsu CM10T |
 |
| 1955 Daihatsu CM10T |
 |
| actual 1955 Daihatsu CM10T |
WORKS-IN-PROGRESS
SeaRAM
I was finally progressing in leaps and bounds towards the finish line, I completed the major assembly of the weapon-loading platform. I designed and constructed the overhead hoist roller, but had the chain hoist 3D-printed for me. Everything then got primed and basecoated. Unfortunately, I hit a fairly major roadblock in late-November when I discovered that the overhead beam was not high enough! AAAAAARRRRRRGGGGGHHHH – so much for the cardinal rule of scratchbuilding “Measure twice, cut once” d’oh! I managed to push on through that obstacle and corrected the height of the platform and reconstructed the upper support arms to compensate. After adding some small details such as locking pins + tethers, hooks, and other fiddly bits, I primed and painted the platform (again), then clearcoated and weathered it lightly with washes. Turning away from the platform – for a much-needed break – I began looking at the remaining parts of the diorama, particularly the missile cases. Some research into markings led me down a few rabbit holes, but gave me a good foundation to design my own decals for printing. I turned to V1 Decals in British Columbia – owned by former IPMS Ottawa member Ben Sweezey – to help me out with those. That is where I am today. The full build album of the SeaRAM diorama is here: https://photos.app.goo.gl/Sv5gjPLiMAC4iQCbA
Glenn Cauley
 |
| SeaRAM |
 |
| SeaRAM scaffolding |
 |
| SeaRAM custom made decals |
 |
| actual seaRAM with crew |
British Army BL Heavy Howitzer (Roden 1:72,with parts from Milicast)
The BL howitzer was desinged by Vickers and mainly produced by Arrmstrong (and three other companies). This one is a BL howitzer modified from a 1916 World War One 8 british inches (203mm) to a 1940 World War 2 re-lined to 7.2 british inches (183mm). The metal wheels were replaced by the large pneumatic ones which make the gun look mean??!! It was towed by the Scammell R100 and used throughout the war. There is an original Mk.VIII on display in the Canadian War Museum, as a number of Canadian artillery units used the later mark.
Graham


 |
| actual WWII BL 7.2 artillery |
BTR-60 (S-Model)
BTR-60PU-12 Бронетранспортер converted to a Comms vehicle. First pic shows mid construction; turret removed, boxes added, grab handles & hatch handles, added and comm mast hidden by green condom looking cover!?
Graham
 |
| BTR-60 PU-12 in the conversion shop |


