Welcome to IPMS Ottawa's ongoing monthly SHOW & TELL, which allows club members to show off their completed work despite not being able to attend group meetings. Each member is invited to send in up to three photos of a model and some explanation.
Next month is the "ANYTHING BRITISH" show & tell.
THANK YOU TO ALL PARTICIPANTS, and KEEP BUILDING
Enjoy the show.
1925 Model T Street Rod (AMT)
This is the AMT 1925 Model T Street Rod kit from circa 1963. I tried to build this kit when I was a kid (I'm also circa 1963) but the poor fit, indifferent moulding and lack of any way to actually attach the body to the frame defeated me back then. I've always wanted to try building another and picked this up inexpensively off of the previously enjoyed shelf at The Hobby Centre. I built it the same way I had tried to as a kid with lime green engine and interior and semigloss body. The kit really doesn't fit any better now than it did years ago, and there are copious amounts of Crazy Glue holding this thing together. The only thing I had to construct was a couple of supports to mount the body onto the chassis. It was a relatively quick fun build, not a contest model by any means, but a decent shelf model and a fun trip down Memory Lane.
Ian MacAulay


KYUSHU J7W1 SHINDEN
The Kyushu J7W1 Shinden ( 震電 "Magnificent Lightning") Fighter was a World War II Japanese propeller-driven aircraft prototype with wings at the rear of the fuselage, a nose-mounted canard, and pusher engine.
Developed by the Imperial Japanese Navy (IJN) as a short-range, land-based interceptor, the J7W was a response to Boeing B-29 Superfortress raids on the Japanese home islands. For interception missions, the J7W was to be armed with four forward-firing 30 mm cannons in the nose.
The Shinden was expected to be a highly manoeuvrable interceptor, but only two prototypes were finished before the end of war. A jet engine–powered version was considered, but never even reached the drawing board.
Paint used: AK Interactive paint, Vallejo and Tamiya.
First flight: 03 August 1945 (war ended two weeks later)
Abandoned as prototype after two built
Patrice Tirmarche


BLENHEIM Mk IVf (Airfix )
An article in The Aeroplane Icons book on the Bristol Blenheim, written by navigator Roger G. Napier, describes a patrol to the coast of Norway by a lone Blenheim of 404 Squadron RCAF. I found this in stark contrast to 404’s later role with Beaufighters in the highly coordinated attacks of the maritime strike wings. Thus it became the first of my projected pair of 404 models.
This Blenheim is the new Airfix kit. I have built a Mk I by Frog and a Mk V from MPM. Both of those kits were overall positive experiences, but each had their challenges. However, the only challenges associated with the Airfix kit were those of my own making. The fit of parts is extremely good, so good that dry fitting is essential, since a light coat of paint or failure to remove a mould seam that appears almost non-existent, can cause problems.
If you are going with dropped flaps, leave the attachment of at least the inner ones until after painting is complete, as opposed to the sequence suggested in the instructions. With the demarcation of the camouflage scheme, you can have the interior colour of the flaps, the under surface colour, and two upper surface colours all overlapping within a square centimetre. It was a devil to paint, then touch-up, then retouch-up, then…
The decals are from Xtradecal X72215. I plan to use one other, a black Mk IV (intruder) from 114 Squadron RAF, but decals for the eight other aircraft will go to the decal bank.
John Greenhorn


Beast 09 (Privateer Press)
This is a mishmash of parts from three or four different resin and metal models from Privateer Press, to create an updated version of their outdated, tiny, badly posed, all-metal Beast 09 sculpt (the last photo shows my version next to the old one).
Most of the model is based on their Extreme Juggernaut, with the legs reposed into a more dynamic pose. Bits were harvested from their Black Ivan, Torch, and Drago models, plus some Apoxie sculpt and Meng rivet sets. Base was sculpted, with textured artist mediums over cork and green stuff sandbags.
Painted mostly with acrylics, with some oils at the end for weathering.
The process and WIP pics are here:
https://iceaxeminiatures.com/2020/07/14/a-more-beautiful-beast/
Brian Latour


Dewoitine D.520 (Tamiya 1:48, & Eduard photoetch set)
The D.520 is the best looking aircraft ever produced, period. Clean lines, and a nice three-colour camo scheme with desaturated browns and greens and cool greys. They even went so far as to make the cockpit a beautiful blue colour.
Assembly went well, aside from some issues on the nose that were probably my fault where I had to do a lot of putty, sanding and rescribing. The photoetch tools that our fearless leader lent me before COVID really came in handy and made the entire photoetch experience not an exercise in frustration.
Camo was applied mostly freehand with an airbrush. Decals were a dumpster fire of frustration, so I removed all but the small ones and repainted the markings. Stripes, arrows and roundels were masked and airbrushed; numbers were freehand painted. All done with acrylics, except for an oil wash in the panel lines. Weathering consisted of using the airbrush to apply the paint in a mottled fashion, then using thin ink glazes and filters to unify the mottling. Light sponge chipping of highlight colours and silver was applied, and exhaust streaks were added by airbrushing a mixture of ultra matte varnish and black and brown inks.
Aside from the horrible, horrible decals, it was an enjoyable build.
Brian Latour


HIGGINS BOAT (Airfix 1:72)
I started this model back on one of the Saturday Build days. (Feb I think). A simple fun build, right out of the box with a few mods to it. I painted it using Vallejo paints and dry/wet brushed on various shades of grey prior to applying the decals. Once decals where added I use the Vallejo washes and some steel spot rubs on the steel plates. The rope was from my quilting supplies.
Victor Haggart


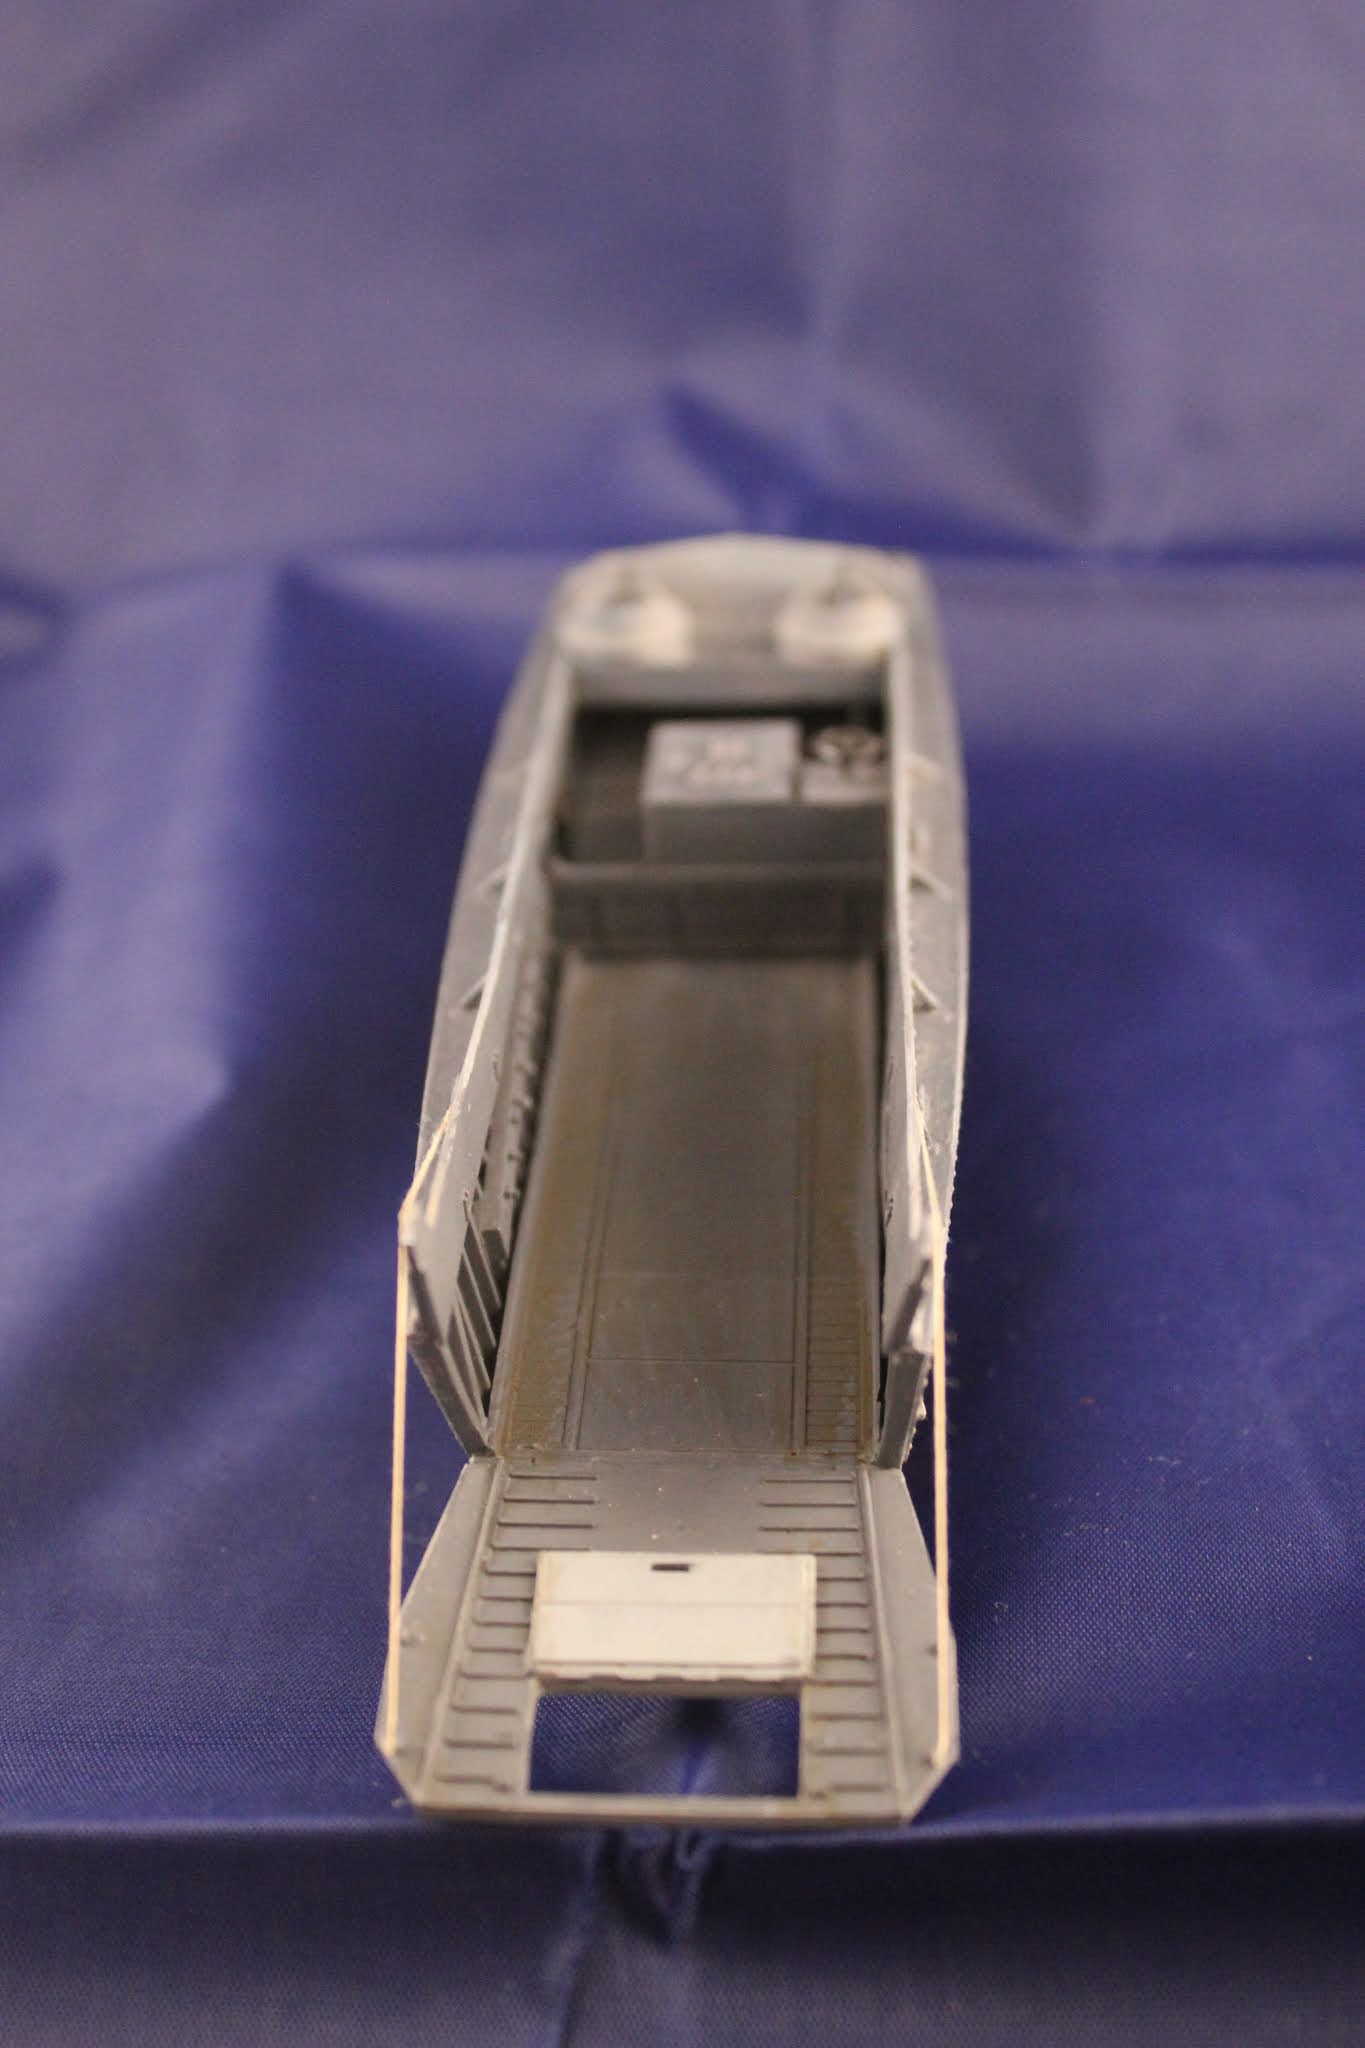
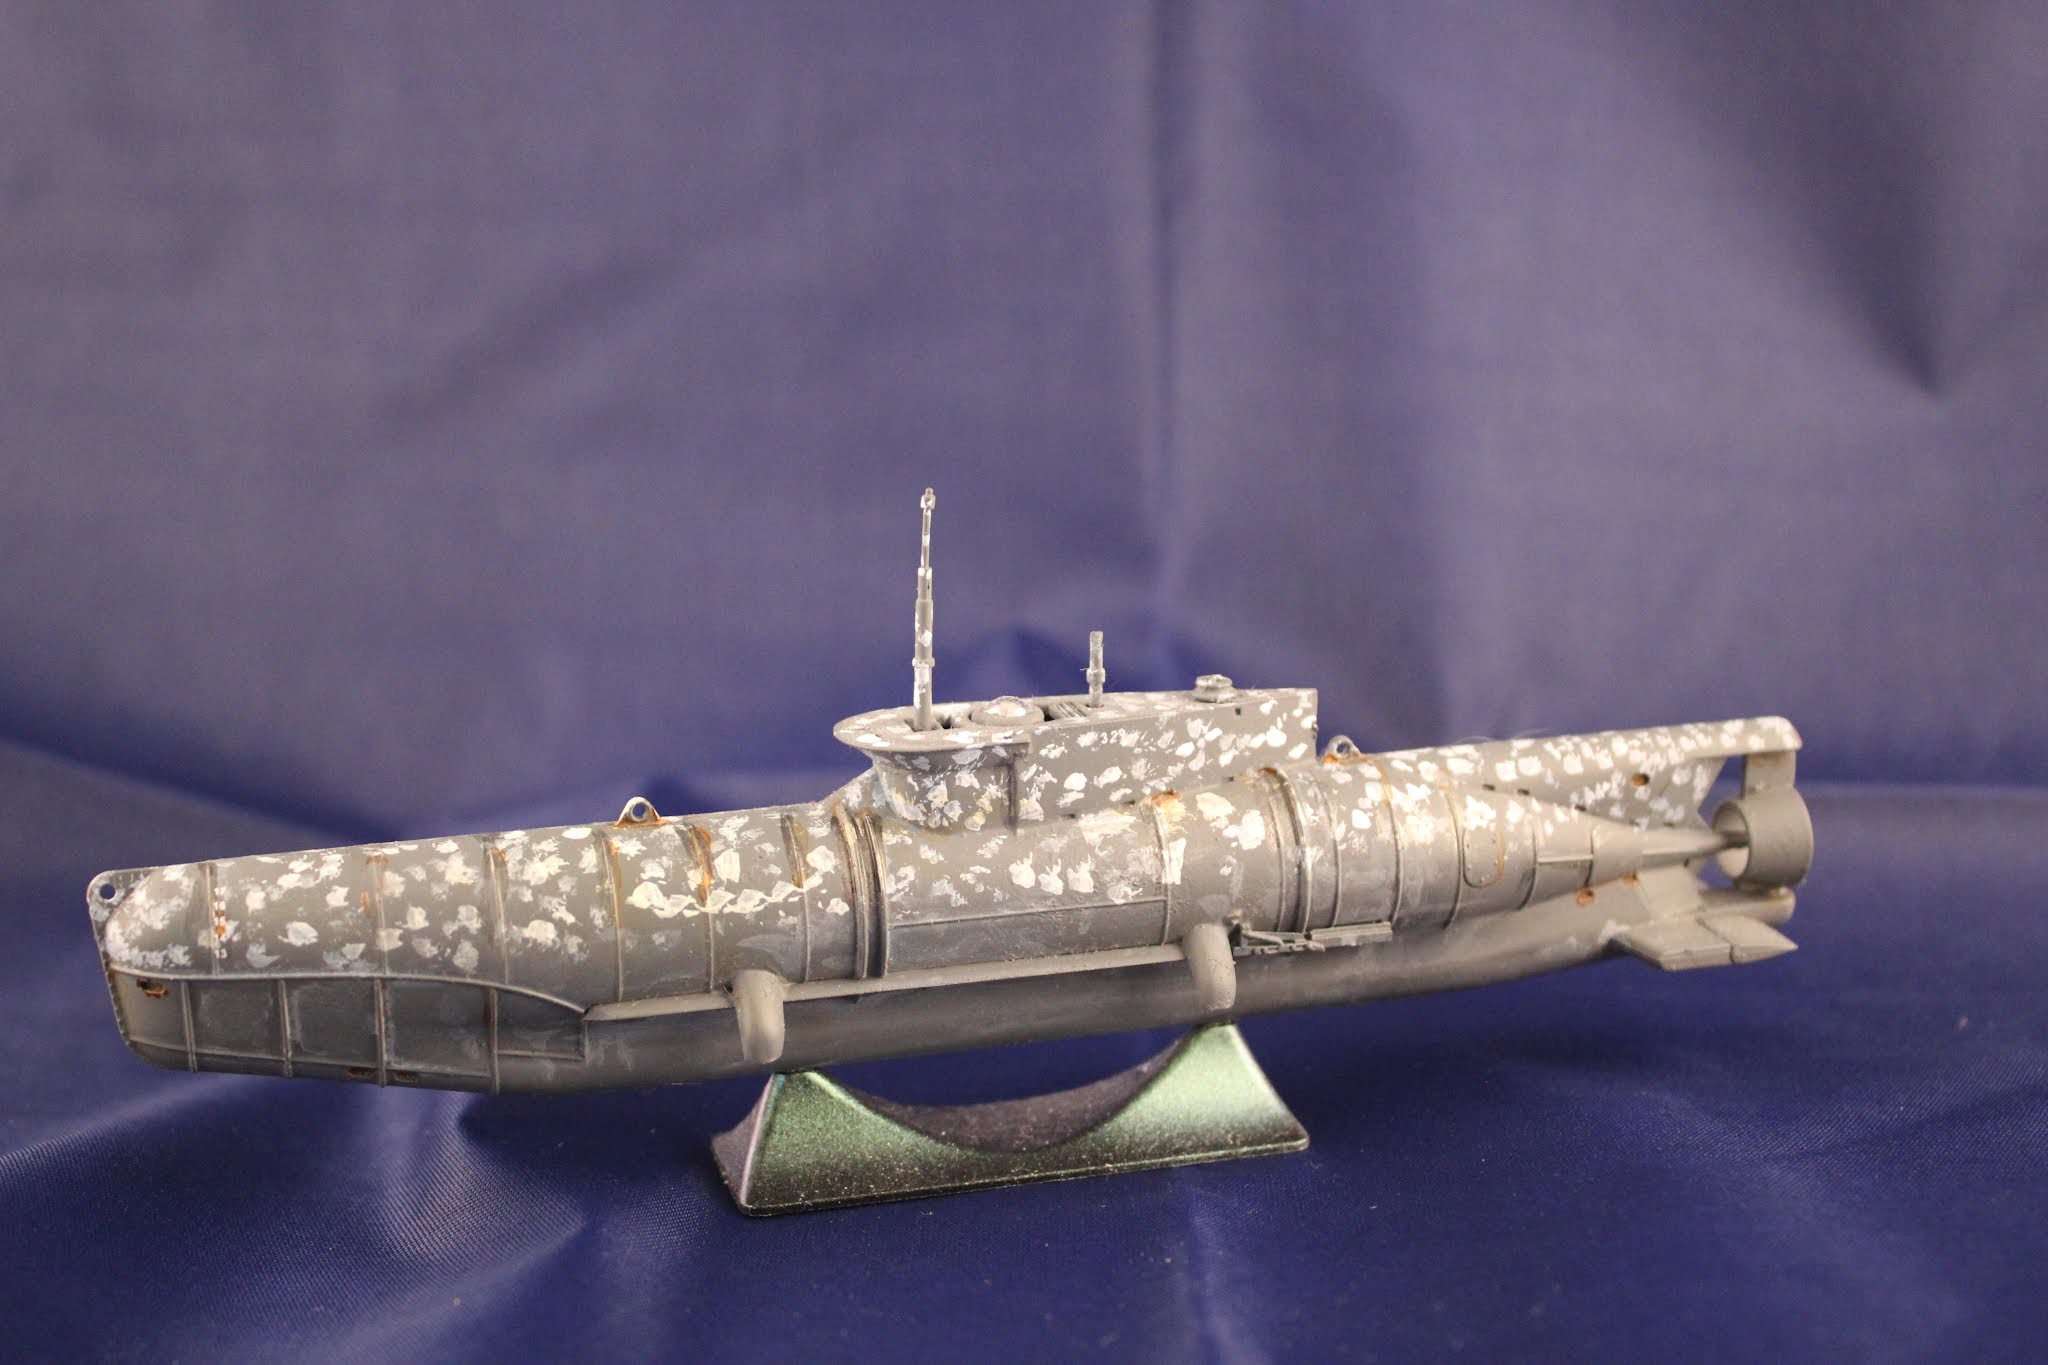
SEEHUND XXVIIB (ICM 1:72)
I started this kit back in the Jan build day. Painted with Vallejo paints. Hand spotted the white dots, used some rust wash and tried out some water colour pencils on it. The stand was painted with one of the new colour shifters.
During Covid I was working off and on extra shifts just to keep busy. I did not do much at the hobby table due to chores and making some face masks. But I do have a couple kits on the go with some research going on.
Victor Haggart


OBJECT 703, IS-3 HEAVY TANK (Airfix 1:72)
Object 703 Ioseph Stalin 3 (IS-3 or JS-3) heavy tank introduced at the end of the Great Patriotic War against Nazi scum. The tank was built by the Chelyabinsk Kirovskiy Tank (Tractor) Factory #100 from 1944 through 1947, where over 2300 were built. It had a 122 mm main gun. The very wide tracks and the multiple bogeys gave it a comparatively light footprint and an ability to move over soft ground and snow. The first tanks reached Berlin too late for the final defeat of the Nazi scum armies
I drilled out the muzzle brake recoil compensator and the end of the gun barrel as these were solid. The railings are very thin rod pushed into holes drilled with a very tiny bit. I added a wooden log across the back, which has tiny metal tie down straps. The tanks treads have pencil graphite rubbed on to simulate bare or worn exposed metal. The pencil edge was also used to accent metal corners on the body and turret. The Guards regiment crest comes on the decal sheet, as does the red star for the bow. Extra decals were used to put the hull number (37) on the turret. The coaxial gun was replaced with some metal-looking item found on my table. I added the rusted chain on the bow.
John Clearwater


WORKS-IN-PROGRESS
P-38 Lightning (Tamiya 1:48)
These are a few "in progress" shots. This kit definitely lives up to the hype and fits together perfectly. I will be finishing it as Miss Virginia because of my fascination with Operation Vengeance (which I have written about on my blog). I am attempting a few new things on this build too - painting almost all the markings, weathering and chipping. Wish me luck!


1914 Mercedes Race Car (Lindberg)
I am building this for an online group build.
The model is by Lindberg and incorrect parts plus lacking detail I decided to do some modifications.
The box artwork shows wire wheels but the kit has wooden rims .
I fabricated body panel from sheet stock.
Machined aluminum round stock on my lathe for the rims.
Next will be to figure out how to do the wire spokes.
Fabricated some brass sheet for the hood.
3D printed the seats (kit seat is a bench type, the seat cushions I made with Milliput.
I am really enjoying this build.


FLACHWAGEN GATTUNG Ssym Plate-Forme Ladegewicht 50 tonne (Modelcollect 1:72)
Our discussion forum is having a Group Build for tank transporters, so I decided to be a little different by building a German Schwerer Plattformwagen 50 tonne flat car and having a Panther as the load. I started with the T-Model 80 ton flat but it is a fidgety kit to build maybe because of all the detail work!? That is when I scored a Modelcollect (MC) 50 tonne flat and initially planned to put 2 early Panzers on it, then found a pic of the Panther on board. The MC kit is good, a bit sparse in detail and accurate research, but one of the chaps on the Group has a lot of good info on the cars. In the pics you can see the Evergreen shapes being added to the under frame, yes, probably will not be seen BUT! I need to correct the positions of the hand brake wheels and brake mode panels as MC mirrored them when they are actually on opposite sides!!
The pic with the car parts and tank was the original plan.
The pic with the wheels/axle combo on a jig is interesting; the jig was made for another company's 80 ton flat but MC's don't fit?? Scale models, eh? The rod with the sprue bit is part of the brake works but I think that was the only one to get removed intact!? That is a .020" brass replacement above it. The bogie sides are 3 parts, glad I'm doing the construction this way, MC's plan was going to be very stressful!!!
The final pic shows all the added framework to the car underside, it is actually quite sturdy now, just needs brake rigging.


CHURCHILL TANK
Our 1:72 armour discussion group is having a contest building Churchill tanks! I have decided on two tanks to start – both AVREs, one is now a monument on Juno Beach, the other a small box girder bridge carrying Churchill. Both kits are from Dragon and two different versions, one a Mk III, the other a Mk IV. The monument tank is getting very few additions, just some work to present a better scale model! The bridger is patterned off the Matchbox kit, so I am rebuilding the bridge as the kit detail is quite soft!
In the pic with the framing the beige piece is the Matchbox kit, white is Evergreen reconstruction.
The spigot mortar is an 11 inch weapon but the pic with the ruler (1:72) shows the kit piece is 2 inches short on the diameter!!?? Was thinking about replacing it but instead decided to go with just thinning the barrel's wall, and it looks much better. Besides Dragon had this weird diamond shape for the inside of the barrel???
The pic with the hull side shows what I have done to replace a 2-D part with a more accurate rendition!
Hope to get the Juno tank finished for next month.


MOSQUITO 4B (Tamiya)
The image shown is the control panel and stick. The other is the seat assembly; pilot and navigator. The belts are scratch built. I figured because of the size i could get away with a lack of detail. I did try to replicate as closely as i could.
Regarding the spar, a lesson learned here. When i first installed it and test fitted the fuselage halves the slots didn't line up. I had installed the spars in a backward position. Actually my wife discovered this. Fortunately i was able to gently pry the affected portion off and reposition.
It appears that if the Mosquito went on a recon , only two bombs could be carried. The other two would be directly over the camera. Or perhaps on a recon no ordinance was carried . I guess it would make sense to be as light as possible. Anyway i look forward to completing this one soon.
Hopefully i will get this kit finished by the end of the year.


C62 形 JAPANESE STEAM LOCOMOTIVE (Otaki ARII)
This is the massive 1:50 scale kit of Japan's most famous locomotive type.It has very complex running gear. The original kit dates from 1969 and was re-issued in 1986. The locomotive is about 30 cm long without the tender. It was bought at the 2013 CAPCON and picked at ever since. The most work so far has been in the past month. Thank you Covid-19 !
These were the largest and fastest passenger steam locomotives ever built in Japan. 49 of these 2-3-2 (Hudson class) giants were built in 1948-1949 by Hitachi, Kawasaki Heavy Industries Rolling stock Company, and served with Japan National Rail until 1973. They were prominent on the most important Tokaido Main Line (Tokyo-Osaka) as the Tsubame つばめ (Swallow) service. Locomotive #17 holds the speed record for a narrow-gauge steam locomotive (129 km/hr). Five units remain and are on display across Japan.

