Welcome to IPMS Ottawa's ongoing monthly SHOW & TELL of WORKS-IN-PROGRESS, which allows club members to show off their bench work despite not being able to attend group meetings. Each member is invited to send in up to three photos of a model and some explanation.
THANK YOU TO ALL PARTICIPANTS, and KEEP BUILDING
Enjoy the show.
Honda CBR1000RR-R Fireblade SP (Tamiya 1:12)
Summertime means BIKING SEASON and so my model building has been slightly sidelined. However, Tamiya chose this time to release their latest 1:12 motorcycle model: the 2021 Honda CBR1000RR-R Fireblade SP. The Fireblade is the flagship of Honda’s supersport lineup, with the 1:1 scale version costing upwards of US$30 000, building the 1:12 scale version is the closest I will ever get to owning one. <cue DROOLING>
To call this kit "fantastic" is a huge understatement; the detail and molding quality are incredible, and Tamiya even offers a detail-up set of machined metal suspension parts. As a still-active track rider, I decided to build this model as the bike could appear at a racetrack (with my rider number... cough, cough). After ‘fondling the plastic’ I dove into the instruction manual to make plans and notes for changes & improvements: discarding all lights, converting the stock bodywork to a track version, converting the stock exhaust system to a full race exhaust, and adding a plethora of fine details throughout. I have gotten as far as building the engine and installing it in the frame, and creating a full race Akrapovic exhaust system (which is very time consuming but rewarding).
Follow my build here: https://photos.app.goo.gl/PqvXsjYrnxsHAZhY9
Glenn Cauley, IPMS Ottawa


Man-O-War Assault Strider x2
Striding into battle, these two-legged steam-powered robotic pack mules carry something special on their backs -- a heavily armoured Man-O-War soldier with a mounted gatling gun for mowing down opposing infantry. These Assault Striders are a kitbash of a few different resin and metal models from Privateer Press to create steam-powered assault walkers. Each one consists of parts of three different models (not including the parts used for debris on the bases), as well a large scratchbuilt section on the body to accommodate the driver and gun. Painted and weathered with various acrylics.
This is a project that I got inspiration for and gathered the parts for a long time ago, but had pushed aside because I was intimidated by the amount of scratchbuilding necessary. COVID has pushed me to finish projects like this though, to make room for more stuff in the stash.
Brian Latour
JIGS
I didn't complete my British build for September, was close but I didn't want to mess things up. Therefore, I wanted to show the group my latest project(s).
I purchased these aircraft assembly jigs from the John Gil sale on the 22nd of August. I had seen these stands in some of the British aircraft magazines, but had never had the opportunity to purchase them. Well, now I have two of them, plus an additional module for assembling biplanes. I don't know how many members availed themselves of these jigs at the sale, but I have learned some things from constructing them.
The plywood they use for constructing these jigs is not the greatest. It is low grade, three-ply plywood, and splinters just by looking at it. Before building, do yourself a favour and throw a few coats of marine spar varnish on both sides of the parts. Your fingers, as well as your tweezers, will thank you! It also means that you can wax the sliding surfaces, and not need to force things into place.
The metal parts could use some refinement. The locking mechanisms for the jig are made up of a machine screw threaded through a wing nut (it works, but is a bit clunky), and the screw length is a bit short. I went over to Ottawa Fastener Supply and picked up some replacement hardware. The machine screws were replaced with some 4mmx10mm stainless cap screws, and used a mix of supplied wing nuts and some stainless wing nuts. The assembly kits provide some metal washers, but I have some 4mm nylon washers on order, which will allow tightening without denting the wood.As you can see, there are parts still drying on the rack. Give it a few days, and I hope to have all these jigs assembled and ready to roll for aircraft building season, whenever that may be for me!
Ken Nesbitt


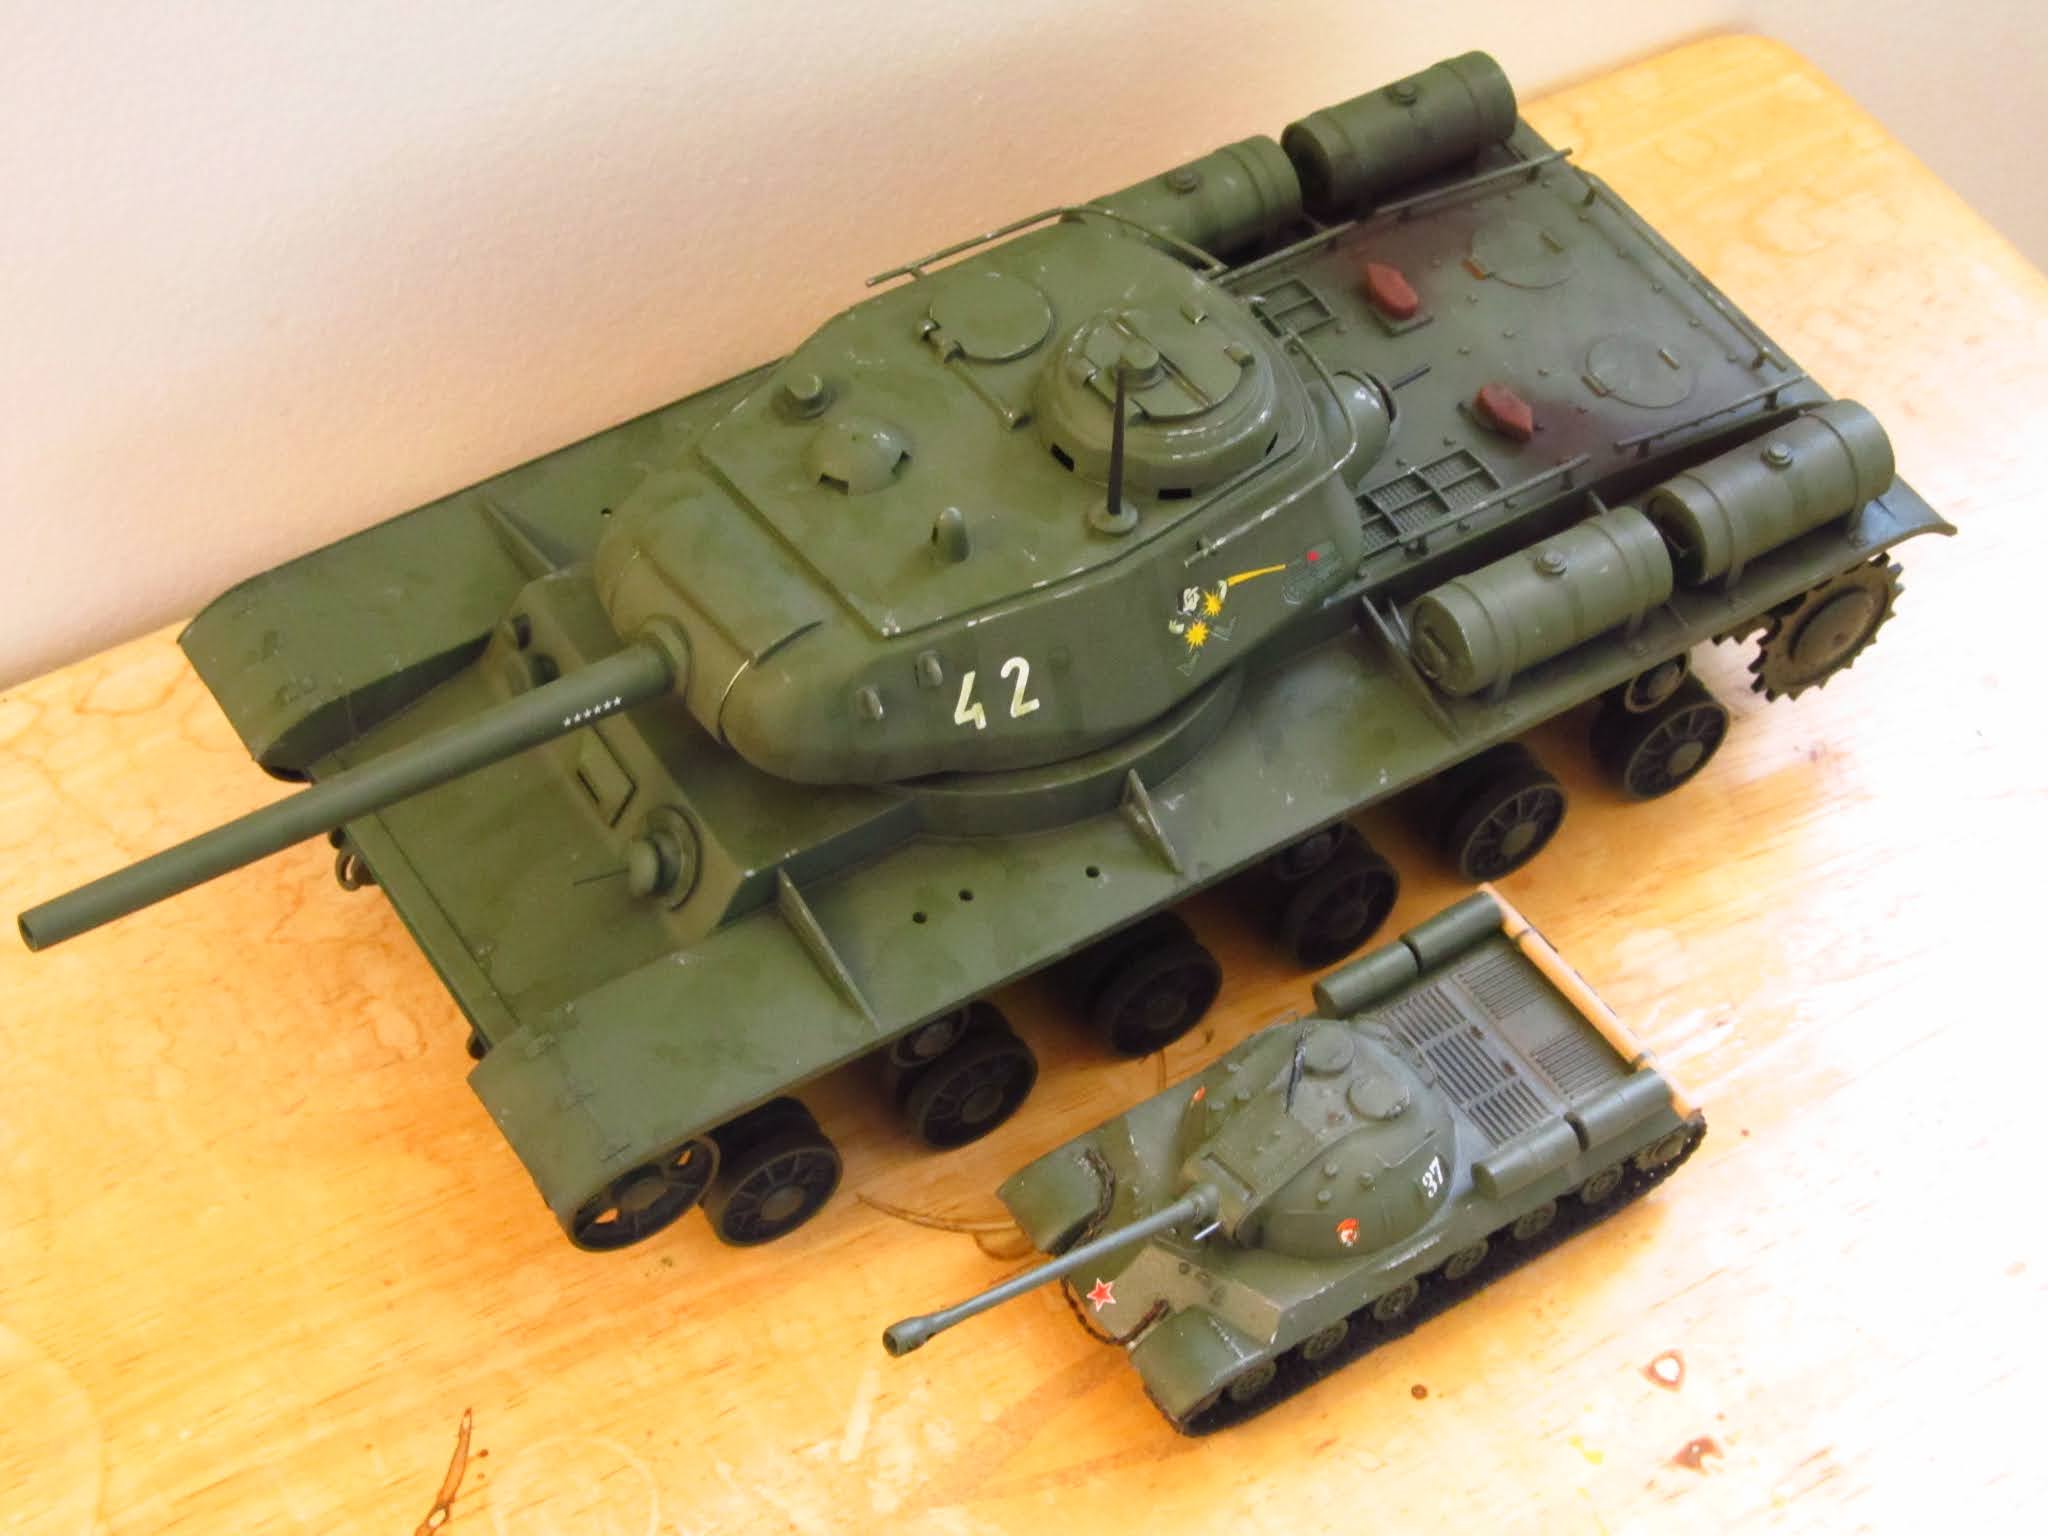
KV-85 (Ogonek 1:30)
This is a work-in-progress of a giant 1:30 scale model of the KV-85 tank from the Московский Завод Пластмассовых игрушек "Огонек" Moscow Plastic Toy Factory "Spark" in the USSR, circa 1975. It was purchased from the John Gil sale 22 August. For scale the item beside it is an Airfix 1:72 scale IS-3.
Wiki says: "The KV tanks is a series of Soviet heavy tanks named after the Soviet defence commissar and politician Kliment Voroshilov A stopgap upgrade to the KV series was the short-lived KV-85 or Objekt 239. This was a KV-1S with the new turret from the Object 237 (IS-85) still in development, mounting the same 85 mm D-5T gun as the SU-85 and early versions of the T-34-85 (not yet in production at the time). The 85 mm proved capable of penetrating the Tiger I from 1000 m and the demand for it slowed production of the KV-85 tremendously (only 148 were built in the end). The KV-85 appeared on the front beginning in September 1943 and its production ended by December 1943. Soviet industry was therefore able to produce a heavy tank as well armed as the Tiger I before the end of 1943. Although the KV-85 was an excellent opponent to the Tigers and Panthers, it was a stopgap and thus was built in small numbers. The complete Object 237 was accepted into service as the IS-85 and was produced in the autumn and winter of 1943-44; they were sent to the front as of October 1943 and production of the IS-85/IS-1 was stopped by the spring of 1944 once the IS-122/IS-2 entered full-scale production." 
Bergpanzer Tiger 1 with Borgward IV Heavy Demolition Charge Vehicle (Dragon 1:35)
My main interest has been Canadian AFVs in service from end WW II to end Cold War. My second focus has been on German Tigers 1 and 2. (Panzerkampfwagen VI Ausführung H). Have built several of each over the years incl a Tamiya 1:16 scale RC Tiger 2. Lots of fun, but expensive! The model of the Bergpanzer/Borgward IV shown here is unique and grabbed my attention in the latter days of my modelling career. (just celebrated 85th birthday). The Germans built 3 types of mobile demolition charge vehicles and the Borgward IV was the largest and most powerful (500 kg charge). It would be driven to the target, drop its load and the driver would drive it away (to use it again). If close to the enemy the driver could get out in the general area and guide it by remote control. In close contact situations its final approach could be guided by radio from a Tiger 1 in the vicinity. Some 1000 of all these explosive vehicles were built overall, with some 360 being Borgward IV. Overall, they were not considered a success. They were employed in the battle of Anzio. They may have played a role in keeping the allies from breaking out immediately by route denial.
The Dragon kit is outstanding quality, as usual. It was COVID 19 that allowed me to find the time to get into the build seriously. As is often the case these days, photo etched components are reduced, and small excellent detail plastic items are provided in great numbers. Much the same challenge as PE, but more attractive results -- I think. Keen eyed folks will note I elected to leave off the outer set of road wheels. I join the late and great Shep Paige in expressing exasperation with preparing and mounting them .Especially those on Tigers. Only other item of concern is the Friulmodel tracks from Hungary. Their quality control has gone to hell. Almost all track pads need both pin holes rebored -- some 400 actions for 200 pads! Overall, a great way to deal with COVID distancing.
Sean Henry
(editor's note: the tank got its informal name "Tiger" from Ferdinand Porsche, and the roman numeral I when the second version of the tank appeared using the same name.)